* Add Ethereum Tooling Guides

* Apply suggestions from code review

* fix tabs

* review comments addressed and some cleanup

Co-authored-by: Federico Kunze Küllmer <31522760+fedekunze@users.noreply.github.com>
Co-authored-by: Federico Kunze <federico.kunze94@gmail.com>
3.0 KiB
MetaMask
Connect your MetaMask wallet with Ethermint {synopsis}
The MetaMask browser extension is a wallet for accessing Ethereum-enabled applications and managing user identities. It can be used to connect to Ethermint through the official testnet or via a locally-running Ethermint node.
::: tip If you are planning on developing on Ethermint locally and you haven’t already set up your own local node, refer to the quickstart tutorial, or follow the instructions in the GitHub repository. :::
Adding a New Network
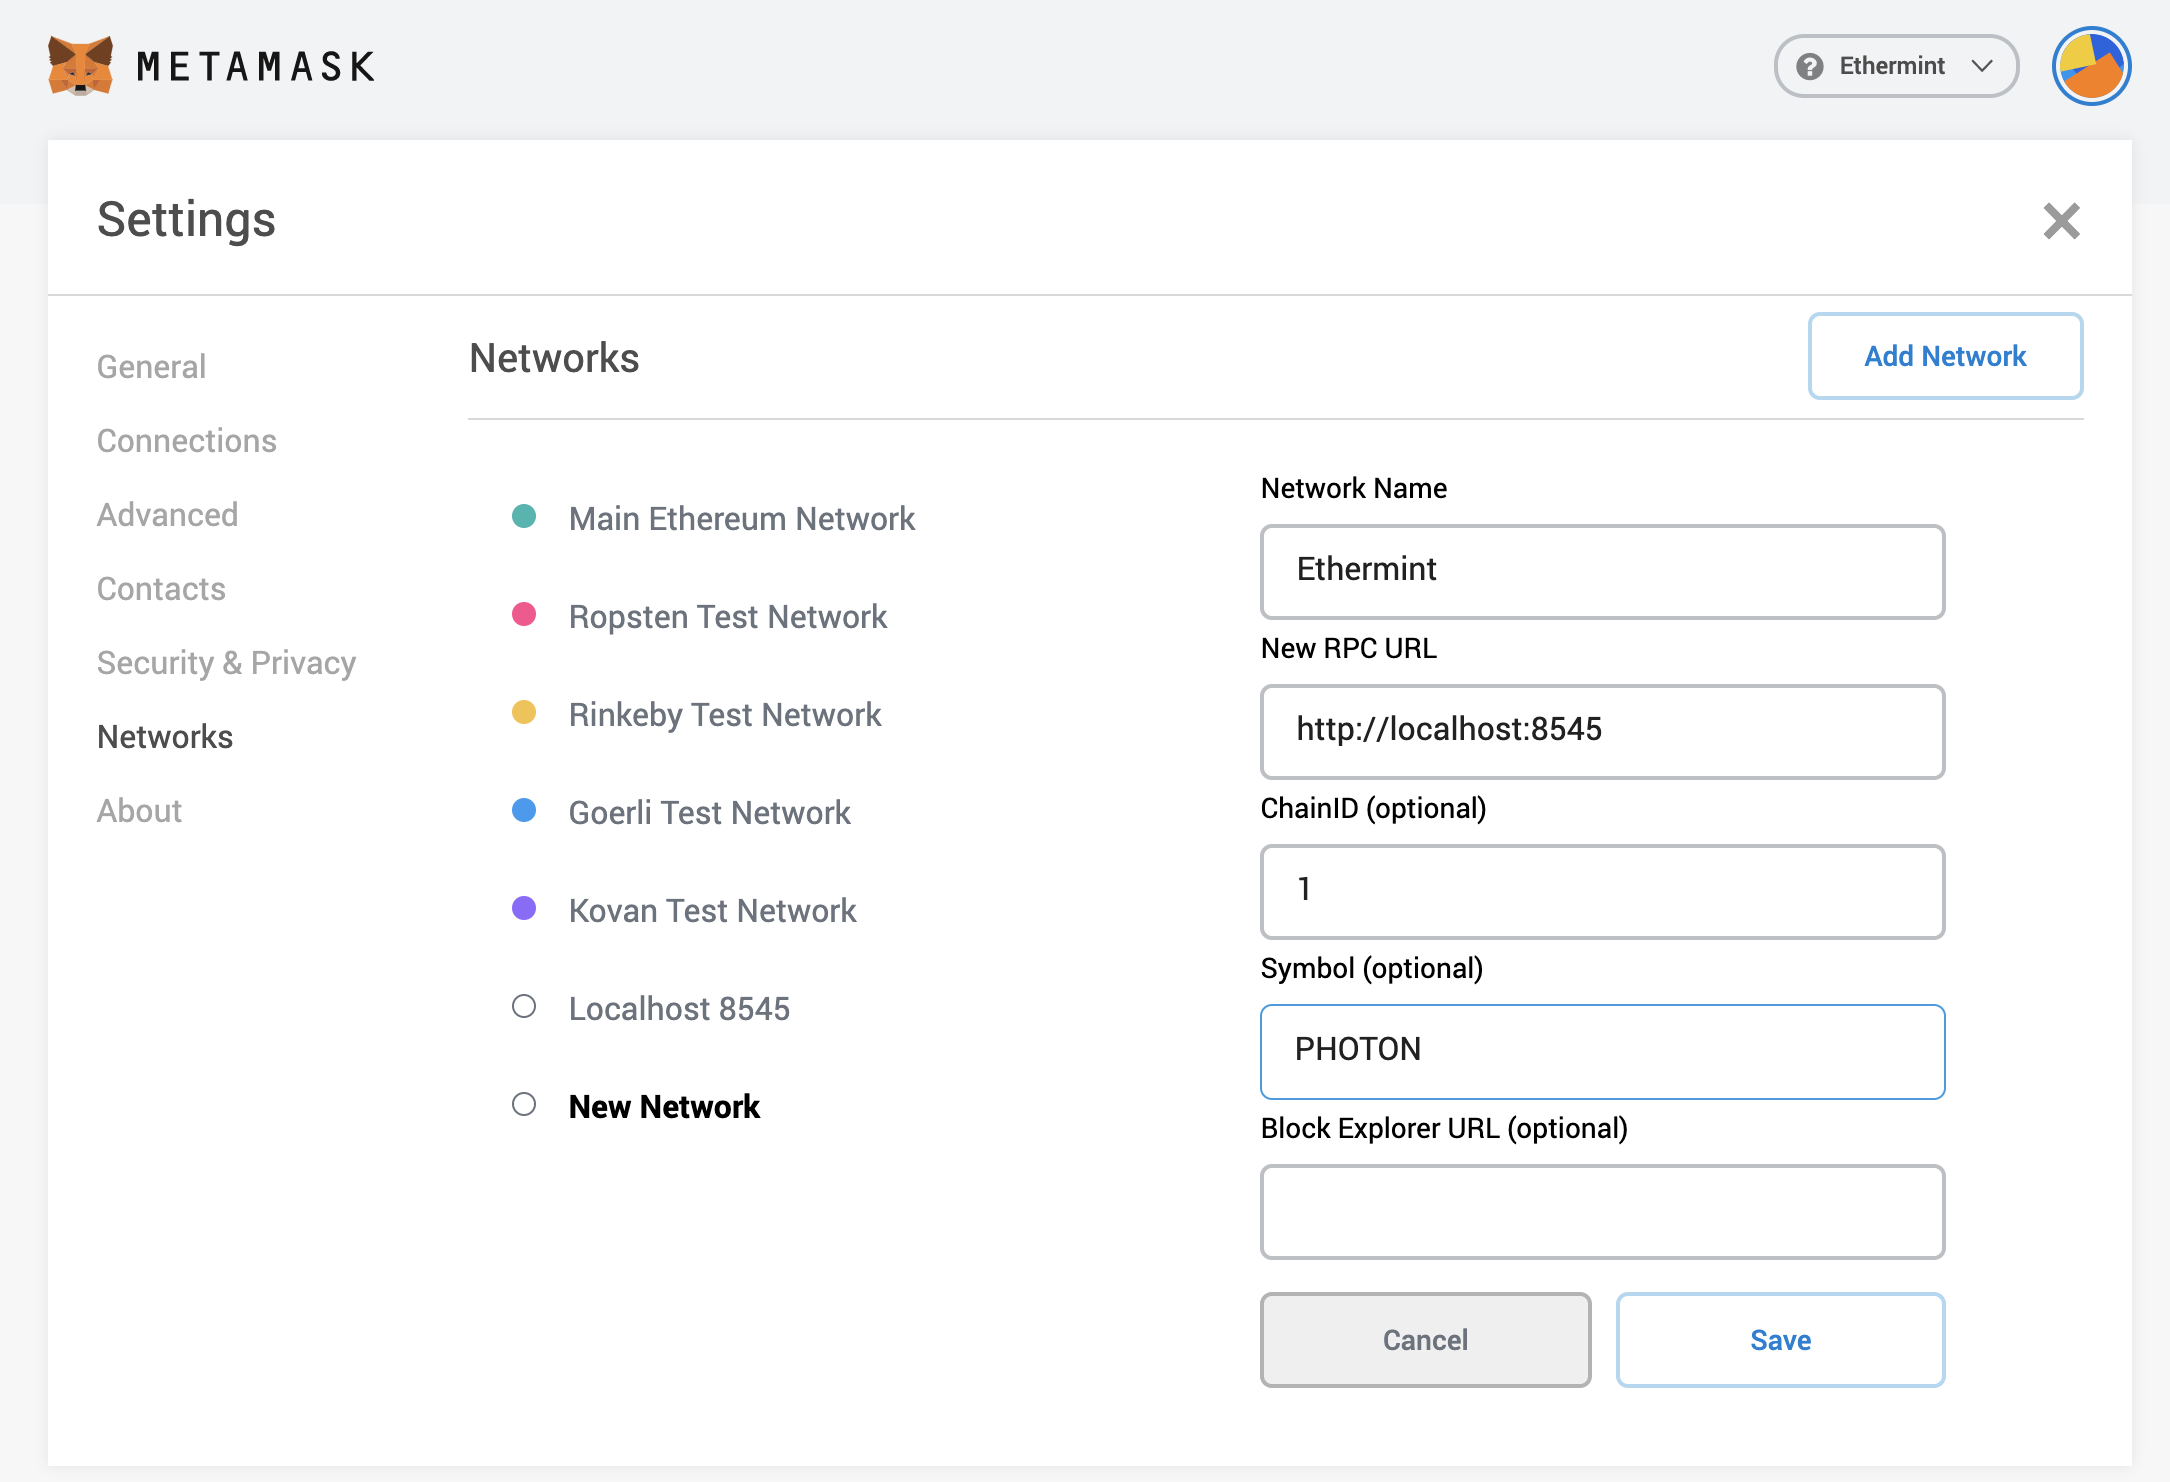
Open the MetaMask extension on your browser, you may have to log in to your MetaMask account if you are not already. Then click the top right circle and go to Settings > Networks > Add Network and fill the form as shown below.
::: tip
You can also find the full ChainID form the genesis.json file. To get the EIP155 chain ID from the Cosmos chain ID, check the Chain ID documentation page.
:::
Here is the list of fields that you can use to paste on Metamask:
:::: tabs ::: tab Local Node
- Network Name:
{{ $themeConfig.project.name }} Local - New RPC URL:
{{ $themeConfig.project.rpc_url_local }} - Chain ID:
{{ $themeConfig.project.chain_id }} - Currency Symbol (optional):
{{ $themeConfig.project.ticker }}-LOCAL - Block Explorer URL (optional):
n/a::: ::: tab Testnet - Network Name:
{{ $themeConfig.project.name }} - New RPC URL:
{{ $themeConfig.project.rpc_url }} - Chain ID:
{{ $themeConfig.project.chain_id }} - Currency Symbol (optional):
{{ $themeConfig.project.ticker }} - Block Explorer URL (optional):
{{ $themeConfig.project.block_explorer_url }}::: ::::
Import Account to Metamask
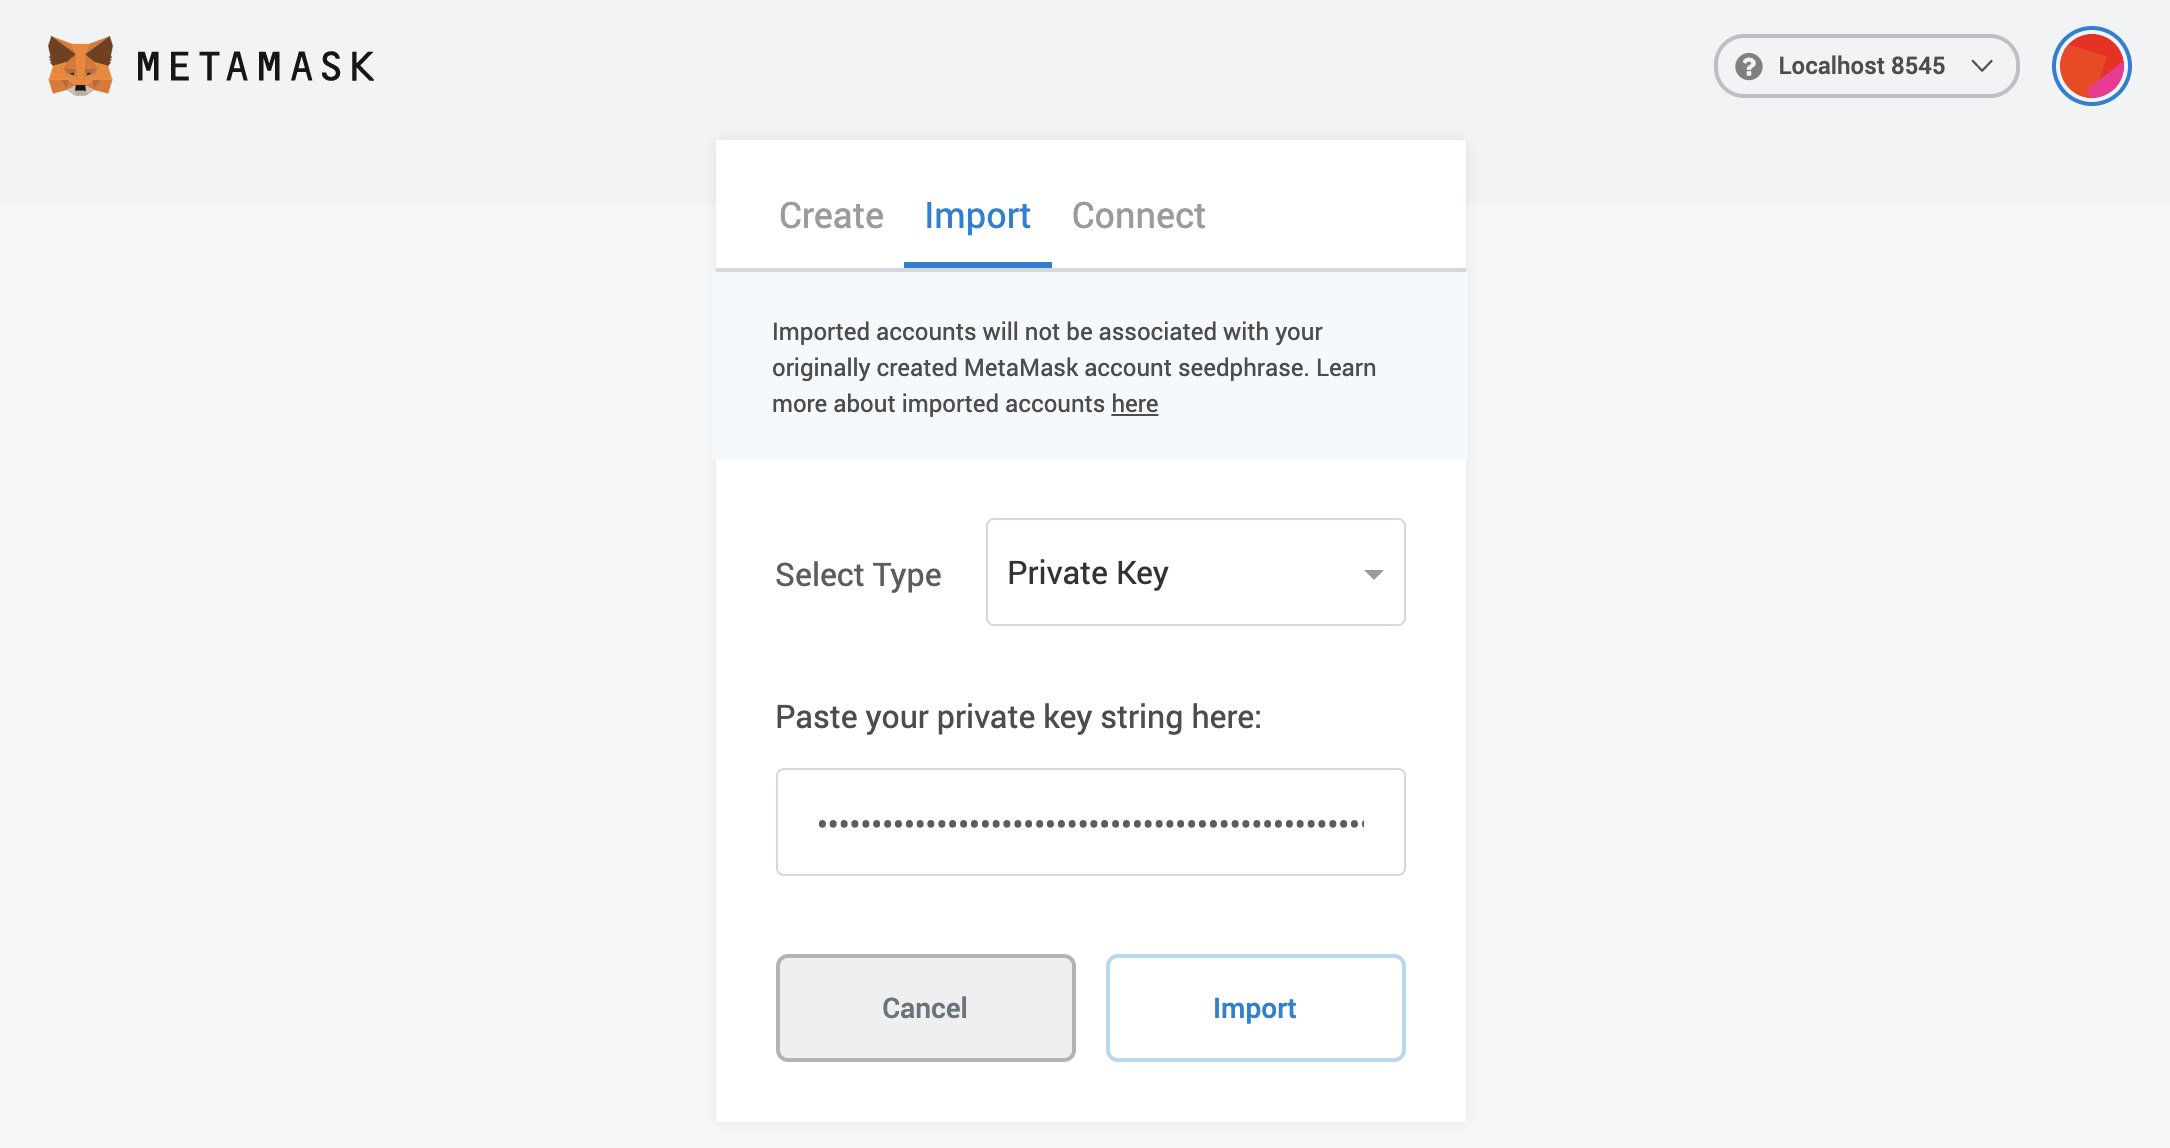
Then close the settings, and go to My Accounts (top right circle) and select Import Account. You should see and image like the following one:
Now you can export your private key from the terminal using the following command. Again, make sure to replace mykey with the name of the key that you want to export and use the correct keyring-backend:
ethermintd keys unsafe-export-eth-key mykey --keyring-backend test
Go back to the browser and select the Private Key option. Then paste the private key exported from the unsafe-export-eth-key command.
Your account balance should show up as 1 APHOTON and do transfers as usual.
::: tip
If it takes some time to load the balance of the account, change the network to Main Ethereum Network (or any other than Localhost 8545 or Ethermint) and then switch back to Ethermint.
:::
Downloading State
To see your Metamask logs, click the top right circle and go to Settings > Advanced > Download State Logs. If you search through the JSON file for the account address you'll find the transaction history.

